A versatile shell utility that simplifies Bitcoin Lightning Network package management while offering a suite of handy tools for seamless node operations.
GitHub Repository ⚡️ User Manual ⚡️ Quick Guides

SLi provides easy package management for Lightning node operators, install, init, configure or update packages trough simple commands. It let you start/stop/reload daemons via systemd, quick edit of configuration files and provides some useful tools such as getting the HEX of macaroon or generating random and secure passwords for your wallet and Lit Web UI.
Interactive mode to install and start a node, managing funds, onchain addresses or channels. Provides Bash completion so you dont need to remember all commands, simply type sli and double press the tab key. It also includes a built-in wallet, encrypted backup functionality and fees management.
Quick Guides
Those sections below provides small and more advanced guides to start with the Lightning Network and SLi.
Installing SLi
Download latest release from GitHub:
sli-v0.3.0.tar.gz
and run: ./sli init. Here is the cmdline way:
wget https://github.com/0xeeli/sli/releases/download/v0.3.0/sli-v0.3.0.tar.gz
tar xzf sli-v0.3.0.tar.gz && cd sli-v0.3.0
./sli init
Alternatively you may want to try out the latest development version, any feedback or contribution is welcome: main.zip
🚀 LiT Node Setup Workflow
A step-by-step guide to setting up and using your LiTd node.
SLi will run a Neutrino node connected to mainnet by default,
so you dont need to download the full Bitcoin chain. All
default settings provided by SLi can be changed via the LiT
configuration file using your favorite editor or launching:
sli edit lit
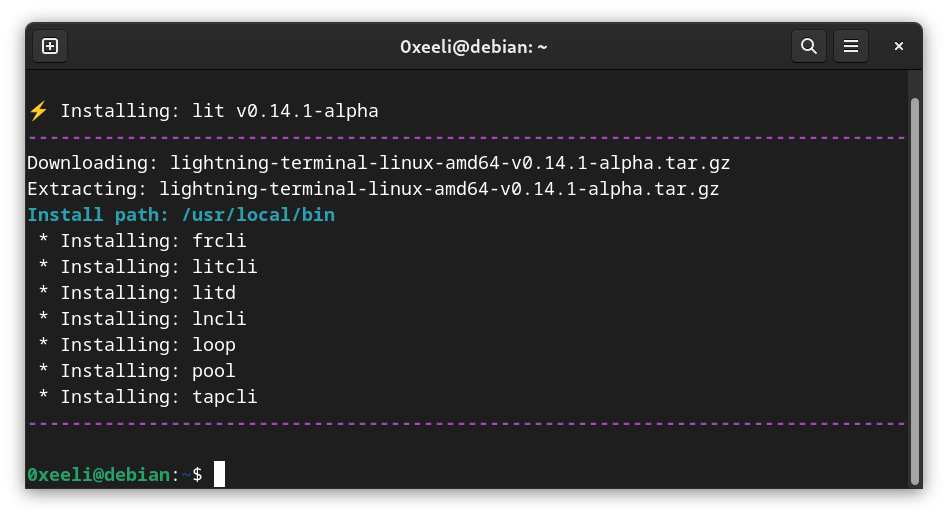
Installation: Installs litd, lncli, loop, pool and friends.
Initialization: Creates basic but working lit.conf, generate strong passwords and setup a wallet interactively. The litd daemon starts and automatically unlocks the wallet thanks to 'lnd.wallet-unlock-password-file=' in lif.conf
sli install lit
sli init lit
Check: https://localhost:8443 • You should have now a working node and Lit Terminal UI!
₿TC Addresses • Channels
We need onchain funds to open a Lightning channel. Create a new BTC p2wkh address (starting with bc). Send fund to it and wait for some confirmation and check your Wallet balance:
sli wa new
sli wa balance
Once you have funded your wallet your are ready to open a channel.
You need to find good and reliable peers and connect to it, you
can do all that via LiT Web UI or interactively from the cmdline
using SLi or manually with lncli
sli connect
sli chan open
You may want to Loop In / Out according to your goal, this mean moving funds between on-chain and Lightning. After creating the channel you will have liquidity to send sats but you can't receive.
Monitor & Optimize
Monitor your node and optimize fees rate. Lower is better to start and spread your new node.
sli fees check
sli fees adjust
Loop - My Channel Is Open, But I Can’t Receive
The concept: a Lightning Network channel is bidirectional. When you open a channel, you contribute liquidity to the network—awesome! However, right after opening, you can only send funds, not receive them. The amount you invested becomes your "local capacity" (the funds available for spending). To receive payments, you need to "spend" some of those sats to create "space" in your channel. This process is called "looping out." Essentially, you’re transferring capacity to your channel peer—the node on the other end—who holds the "remote capacity" (the ability to send to you). In summary, your channel has a "local capacity" for spending, while your peer controls the "remote capacity" for receiving.
If you’re like me when I started—working with smaller channels—you might find that you can’t loop out due to minimum amount requirements on services like Loop. In that case, you can use a service like Boltz to move funds from Lightning to an on-chain Bitcoin address. This frees up space in your channel, allowing you to receive payments. It can feel a bit confusing at first, but it gets easier with practice!
Setup and connect Alby Hub to LiTd or LND
I started my Lighning journey with Alby Hub so I wanted it to be integrated in SLi. The cool thing with Alby is an easy to use interface, make accounts for fiends or family, get a name@getalby.com address for Lighting payments as well as Nostr ecosystem connection.
Install Alby Hub:
sli install albyhub
If you are using your personnal computer for testing purpose, you can directly start Alby and connect to it:
sli start albyhub
And open: localhost:8029
Hopefully Alby is running ;-) Check it, test it, love it!
You may want to connect Alby to your LiTd or LND node, select advanced option when setting up Alby. If you use your local computer it will connect directly.
Alby Hub on VPS
You may, and that's a good choice, run your LiTd / LND node on a virtual private server. The advantage is to have a running node 24/24, that may be not possible with a home computer. You can find cheap VPS providers for 35 USD by year. Prons: You handle everything, you have full control. Cons: you have to get your hands on cmdline and Linux.
If you go for a VPS, you can then install Alby on it and securely use it via a reverse proxy or a SSH tunnel. If you want to setup Alby with Lighttpd (low resource web server) here is my Lighttpd reverse proxy config
Ping Amboss Health Check
Amboss offer great tools
for Lighning node operators, one of them is the Healthcheck Status
page. SLi can configure it in one single command, it will create
the necessary systemd service and timer file. At first launch it
will ping amboss API and ask you if you want to enable a ping each
hour, witch is mendatory to get all the nice green candle on your
Amboss node page. After the setup you can check the service with
systemctl or SLi built-in logs. Here we go:
sli ping-amboss
sli st ping-amboss
sli logs sli